Since we’re trapped inside for the foreseeable future, I thought now would be the perfect time to post a sauerkraut recipe! There’s a few different reasons for that. First and foremost, it lasts forever. Or, for a really long time, anyway. It’s also doesn’t require much in terms of ingredients. All you really need to make sauerkraut is cabbage and salt. That’s literally it. But despite its humble ingredient list, sauerkraut is packed with flavor. And probiotics, making it great for gut health! Also, delicious.
Now that I’ve gone through the wonderful pros of sauerkraut (and fermented foods in general), I should tell you about the cons. The two big cons associated with sauerkraut are that it takes a while to make, and that there’s a bit of risk involved. Risk of mold, to be more specific. With proper sterilization and handling, you should be totally fine! But sometimes you do everything right and your sauerkraut ends up getting moldy anyway. If that happens, I’m very sad to report that you’ll have to toss the whole batch. Unless you want to risk getting sick. Which is inadvisable, especially with hospitals being as overtaxed as they are at the moment.
Sterilization
So the big thing you want to make sure of is that you properly clean everything you use to make your sauerkraut. Since you’re basically harvesting bacteria, you want to ensure that you’re creating an environment where the good ones can thrive. Otherwise, the bad ones will take over and you’ll get mold spots, and honestly, you just don’t want to go down that road.
ANYWAY, you have two options for sterilization. Either boil all your gear in a large pot of water for a few minutes, or carefully wash it with dish soap. If you go with the latter, just make sure that the soap isn’t anti-bacterial. That can strip the environment a bit too much.
Apart from that, make sure to wash your hands a bunch (thanks to COVID-19, this should come as second nature) and you should be good!
Variations
As I mentioned earlier, all you really need to make sauerkraut is cabbage and salt. That said, you can totally experiment with other flavors and ingredients! This recipe also contains apples and garlic, but you can really riff on this concept as much as you’d like. For instance, I once made a sauerkraut with habaneros and cherries that was pretty delightful.
Fermentation notes
Something hugely important when making sauerkraut is to keep the cabbage under the brine. If it’s exposed to any air, it can become contaminated and get moldy. And as we’ve established, mold is not our friend.
To make things easier on myself, there are a couple tools I like to use. The first are weights. These dudes literally weigh your kraut down to keep it beneath the brine. You can get crafty with your weights. Some people use rocks that they’ve found and sterilized for this. I like to keep things simple with a set of pre-made ones. The other tool that I like to use is a fermentation lid. Technically, you don’t need this. But if you use a regular old jar lid, you’ll need to burp your jar every day or deal with a sauerkraut explosion, and that just seems like a pain. So I use special lids to make my life easier.
Luckily, both items are fairly cheap and available on Amazon! (Speaking of, the links I’ve provided are affiliate links. That means that if you click through and buy something, I’ll get a small percentage of the sale. Don’t worry, though – this doesn’t affect you in any way, and I stand by the products that I’m recommending!)
Alright, I think I’ve covered all my bases so on to the recipe!
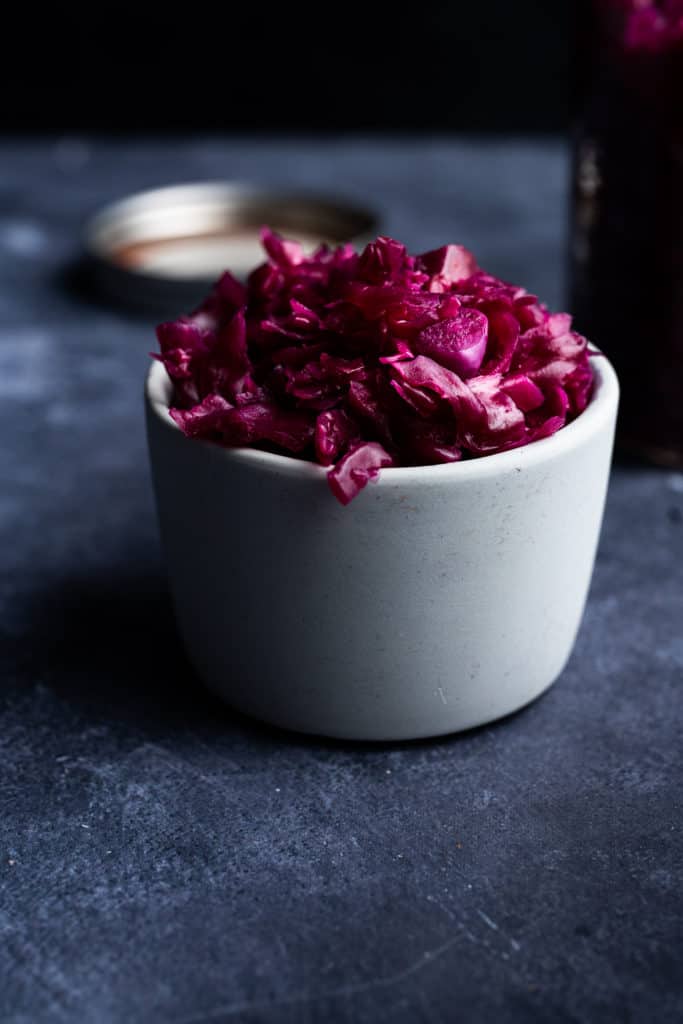

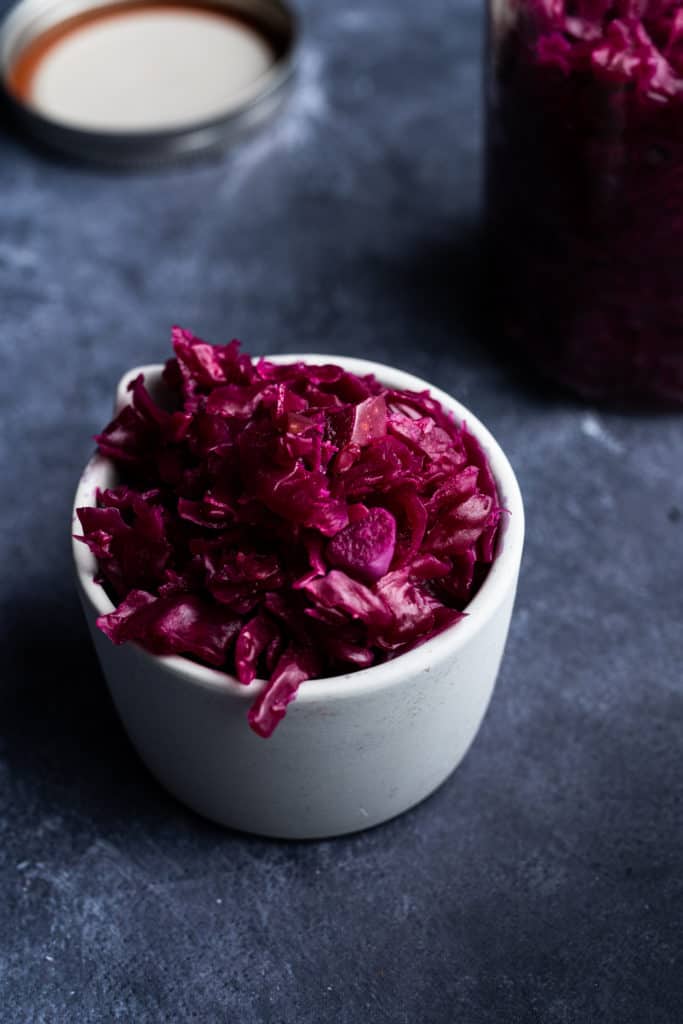
Garlic Apple Sauerkraut
Equipment
- A wide mouthed mason jar
- Fermentation weight (makeshift is fine!)
- Fermentation lids (optional, but recommended)
Ingredients
- 1 Cabbage (I used purple, but green is totally fine, too)
- 1 tbsp Salt (You may not use all of this)
- 4 cloves Garlic Roughly chopped
- 1 Apple Roughly chopped
Instructions
- To start, remove a the outer leaves from your cabbage. Toss any dirty ones, but keep a clean one and set it to the side. Now, slice your cabbage into thin strips. You can either use a mandoline for this, or just do it by hand.
- Transfer the sliced cabbage to a large bowl and add some salt. I like to start with 1 tsp at time because while you can always add more, you can't fix your kraut if it's too salty. You may work your way up to about 1 tbsp of salt, but use your judgement. A good rule of thumb is that if it tastes good while you're making it, it'll also taste good when it's done. Now, massage the salt into the cabbage. As you massage, you'll start to see your bowl fill up with liquid. That'll be your brine. Keep massaging until you have enough brine to cover everything you put in your jar. It might take a while. If you get tired, take a break and let it rest at room temperature for a bit. That should make it easier to work with.
- Once you have a good amount of brine, add in your garlic and apples. Mix it up, and stuff it all in your sanitized mason jar(s). Pour in enough brine to cover everything. Then add in the full cabbage leaf you set aside at the beginning of this process. This will help hold everything beneath the brine. Next, add your weight. Push it all under the brine, and close it up! Once again, if you're using a regular lid, you'll need to open it once a day to let pent up carbonation out (this is called burping). If you're using a fermentation lid, you don't need to bother with that.
- Put the jar in a cool, dark spot and let it do its thing for about one to four weeks. After a couple days, you may notice some bubbles! That's a good sign. It means your kraut is active and happy. Check on it every day or two to make sure everything stays beneath the brine and no gross mold appears. Another good sign is a sour, fermented smell. If you've ever had sauerkraut you'll recognize it. Try a little bit of your kraut every so often. If you're happy with how it tastes, it's done! Once you're satisfied, remove the weight and cabbage leaf. Then seal it up with a regular jar lid and put it in the fridge. Fermentation is a preservation technique, so it'll last quite a while in there!
Ok, I know that recipe was a bit dense, but I promise it’s not so scary once you jump in! And once it’s done, you can enjoy it any way you’d like. It’s obviously great on hot dogs and sausages (vegan or otherwise), or roasted with some root veggies or pork. It also makes a wonderful addition to salads, though I should warn you that it can be a bit pungent, so it’s not the best for shared lunch rooms at work. But if you’re working from home right now, that won’t be a problem! Finally, if you enjoy the process of fermentation, consider giving my fermented guava hot sauce a try. It’s one of my absolute favorites. And of course, if you make this, let me know your thoughts in the comments or on Instagram! I always love hearing from you and seeing your glorious creations.