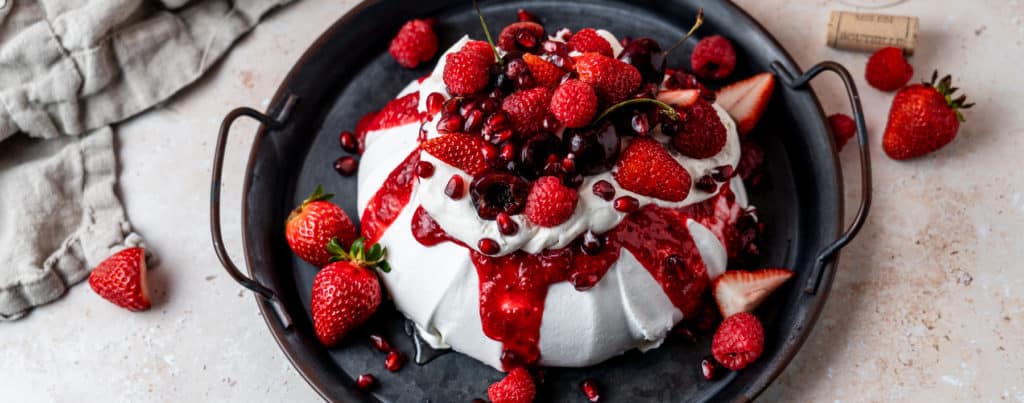
I love a good pavlova. They’re super decadent and fancy looking, and once you’ve got the process down, they’re easy to throw together, too! But perhaps my favorite thing about them is how customizable they are. The base is just meringue, which is essentially pure sugar. So when choosing toppings, you want to make sure that there’s a bit of acidity to balance things out. For that reason, tart fruits are always a good choice! You can totally leave the fruit raw, but for this recipe I decided to make a red berry compote. It’s got raspberries, strawberries, and cherries, and my god is it good. I also threw a bunch of berries and pomegranate arils on top for good measure. And whipped cream. Because if there’s one thing a pavlova shouldn’t be, it’s boring.
Let’s discuss customizability
Since I mentioned the customizable nature of the pavlova, I figure it’s only right to expand on that thought. When it comes to toppings, you could opt for a curd. Those are always a tangy delight. I usually include some homemade whipped cream in my pavlovas. I just find that it ties them together nicely. But you can even branch out and do something like a balsamic reduction! The possibilities are truly endless for pavlova toppings.
And in addition to toppings, you can add a twist to the pavlova itself! I once made charcoal mini pavlovas that were pretty delicious. Cocoa or matcha powders would also mix in nicely. I’ve even seen pavlovas with fruity swirls baked into them! So again, endless possibilities.
Will you need any special tools?
There are a couple of things you’ll need to make this pavlova. (And compote. And whipped cream.) Chief among them is a stand mixer. A hand mixer will do in a pinch, but I’m a big fan of my KitchenAid stand mixer. I’ve had it for probably nine years now and it’s just the best. Anyway, you’ll need this to make both the pavlova and the whipped cream. You can technically make meringue without a machine, but the one time I did it I felt like my arm was going to fall off so I wouldn’t recommend it. I also puréed my compote for a silky, smooth sauce. You can definitely mash the berries by hand if you’re cool with a more rustic feel, but I prefer the more polished result I get by using a food processor. I couldn’t find the exact model I have (it’s a couple years old), but I linked one that looks pretty similar!
A word on timing
So here’s the thing. You’ll want to put plenty of time between baking this pavlova and eating it. That’s because after you bake it you’ll want to leave it in the oven for about two hours as it cools. This will help prevent the pavlova from cracking. If I’m being honest, a crack isn’t the worst thing in the world. You’re going to cover it up with toppings and sauces galore, after all. But if you’re anything like me, you’d rather avoid it even if it doesn’t matter. All that extra time will give you a chance to prepare your compote and whipped cream! Plus anything else you plan on eating for dinner or whatever.
*Note: the above links are affiliate links. That means that if you click through and make a purchase, I’ll get a small commission at no cost to you. Don’t worry, though, I wouldn’t lead you astray just for a tiny commission!
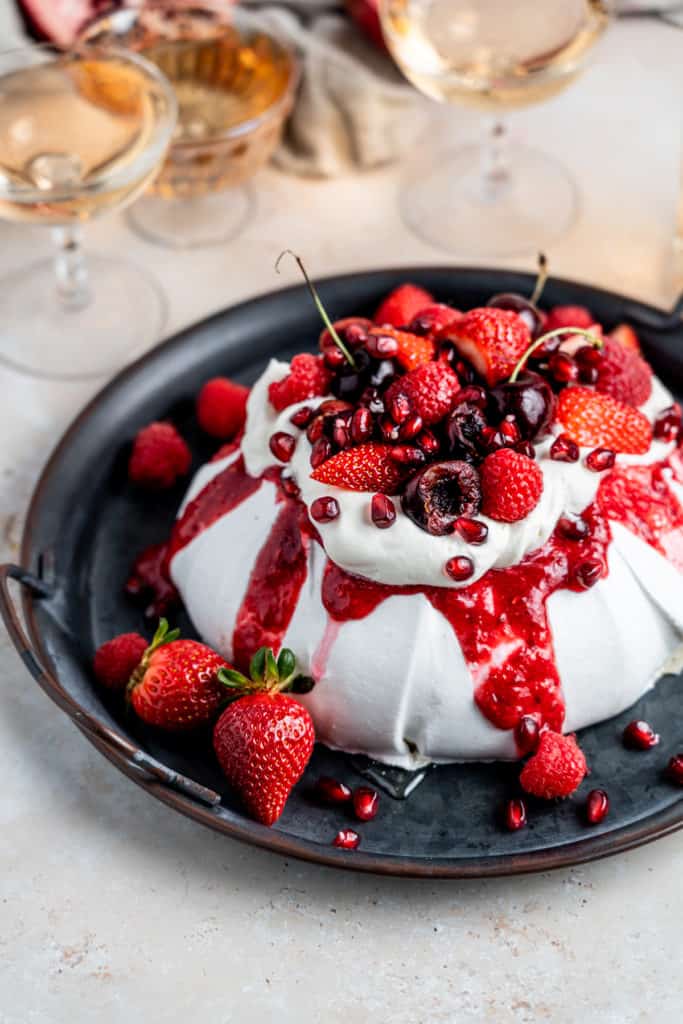
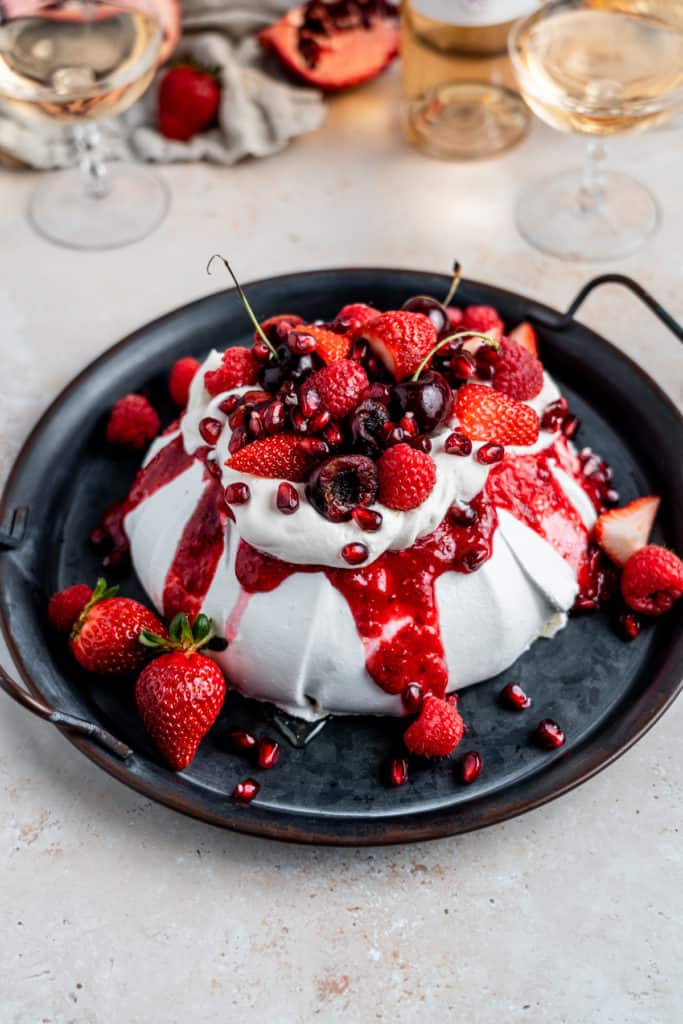
Easy Pavlova with Red Berries and Whipped Cream
Ingredients
Pavlova Base
- 4 Large egg whites (At room temperature. Save the yolks for cured egg yolks, pasta, or curd!)
- 1 1/4 cup Granulated sugar
- 1 tsp Vanilla extract
- 1 tsp Lemon juice (Freshly squeezed)
- 1 tsp Cornstarch
Berry Compote
- 1 cup Mixed red berries (Roughly chopped – I used a combination of strawberries, raspberries and cherries.)
- 1 tbsp Lemon juice (Freshly squeezed)
- 1 tbsp Granulated sugar
Whipped Cream
- 1 cup Heavy whipping cream
- 1/2 tsp Vanilla extract
- 1 tbsp Granulated sugar
Garnishes
- Strawberries
- Raspberries
- Pomegranate arils
- Cherries
Instructions
- Preheat the oven to 300° Fahrenheit and line a large baking sheet with parchment paper.
- Make the pavlova. In a stand mixer, whisk the egg whites on medium speed until soft peaks start to form. This should take about 4-5 minutes. Then gradually pour in 1 1/4 cups granulated sugar and continue to whisk until stiff, shiny peaks form. This'll take another 2-3 minutes. Once you've got your stiff peaks (meaning when you lift the whisk out of the bowl, a peak forms and doesn't flop over), add in 1 tsp vanilla extract, 1 tsp lemon juice, and 1 tsp cornstarch and continue to whisk for another minute until everything is incorporated.
- Transfer the pavlova base to your parchment paper lined baking sheet. I like to do this with a large spoon and then gently sweep the back of the spoon upwards around the entire pavlova to create a beautifully styled exterior. (You can totally skip ththe sweeping if you're going for a more rustic feel.) Then put the pavlova in the oven and decrease the temperature to 200° Fahrenheit. Cook for about 90 minutes, then turn the oven off and leave it alone for another 2 hours.
- Pop a metal bowl for your stand mixer and its whisk attachment into the freezer so that they're nice and cold when you go to make your whipped cream. You'll want to leave them in there for at least 20 minutes before making the whipped cream.
- Make the berry compote! To do this, put 1 cup of roughly chopped red berries (I used strawberries, raspberries and cherries) in a medium saucepan. Add 1 tbsp lemon juice and 1 tbsp granulated sugar and cook on medium heat for about 5 minutes, breaking up the berries with a large spoon as they cook. Set aside to cool for a few minutes, and then transfer to a food processor and blitz until smooth!
- Make the whipped cream. To do this, pull your bowl and whisk out of the freezer and attach them to your mixer. Add 1 cup heavy whipping cream, 1/2 tsp vanilla extract and 1 tbsp granulated sugar to the bowl and whisk on high for about 1 minute, or until soft peaks form. Be careful not to overmix!
- Now all that's left to do is assemble! Carefully peel your pavlova off the parchment paper and put it on your favorite platter or large plate. Add a generous serving of whipped cream to the top of it, followed by your berry compote. Finally, add as many fresh berries and pomegranate arils as you'd like and serve immediately!
Whew, that was a mouthful! So listen. I know the title says ‘easy’. I also know it probably doesn’t seem that way. Hear me out, though. There may be a lot of steps to this pavlova, but assuming you don’t over-mix, each one is pretty simple. You can do this. I believe in you.
If you end up making this pretty pavlova, let me know your thoughts in the comments or on Instagram! I always love hearing from you and seeing your beautiful creations.
And if you’re looking for more tasty desserts, check out my gooey s’mores bars or my chocolate covered passion fruit and raspberry cheesecake (this one’s actually a low carb option)!
